How to Take Care of Indoor Plants Without Sunlight (7 Easy Tips)
My first apartment had one window. It faced a brick wall about four feet away. I brought home a pothos because every plant guide online called it “basically unkillable” — and within six weeks it was a yellowing, drooping mess sitting in soggy soil on my kitchen counter. I had been watering it every seven days like the tag said. What the tag did not say was that a plant sitting three feet from a brick wall in near-darkness uses almost no water at all. I was drowning it with kindness.
That one dead pothos taught me more about low-light plant care than any guide I read afterward. So this is not a generic list of tips. This is what actually changes when your home does not get real sunlight — and the seven adjustments that finally made my plants survive and stay alive.
Why Most Indoor Plant Advice Fails in Low Light
Here is the problem nobody talks about. Most plant care guides are written assuming your plant is sitting in a bright window with at least four hours of indirect light per day. Every watering schedule, every fertilizing tip, every humidity recommendation is built on that assumption.
Take that same advice into a north-facing room, a basement, or a windowless office and you will kill your plants faster than if you had done nothing at all. Low-light care is not regular care with the lights dimmed. It requires a completely different approach — and once you understand the three things that actually change when light drops, every other decision becomes obvious.
Photosynthesis slows down. The plant produces energy more slowly which means it grows more slowly. Fewer new leaves per month is completely normal and does not mean something is wrong.
Water consumption drops dramatically. This is the one that catches almost every beginner. A plant in low light uses a fraction of the water it would use in a bright window. The soil stays wet far longer because evaporation is slower and the plant itself is pulling less moisture through its roots. My pothos in the brick-wall apartment was sitting in wet soil for twelve days at a time. That is what killed it — not the darkness.
Root rot risk goes up sharply. Combine slow water usage with consistently damp soil and you have perfect conditions for fungal root rot. This is why drainage becomes non-negotiable in low-light care in a way it sometimes is not in brighter conditions.
Can Indoor Plants Actually Survive Without Sunlight?
Yes — with one important clarification. No plant survives in complete permanent darkness. Even the toughest low-light species need some form of light to photosynthesize, even if it is dim and indirect.
What is genuinely possible — and what most people searching this question actually need — is growing plants in rooms with no direct sun. North-facing rooms, windowless bathrooms, interior offices, basements. In these spaces, the right plants with the right adjustments will not just survive. They will grow steadily and look genuinely healthy year-round.
The seven tips below cover exactly how to make that happen.
Tip 1 — Choose Plants That Were Born for Low Light
📍 Place hero image here Alt text: how to take care of indoor plants without sunlight - pothos and snake plant thriving on a shelf in a dim north facing room
The single biggest factor in whether your low-light setup succeeds is plant selection. Some plants evolved under dense forest canopies where direct sunlight never reaches the ground. Others evolved in open fields and will slowly decline no matter what you do in a dark room. Getting this wrong from the start means no amount of care will save the situation.
These are the ones I have personally kept alive in genuinely dim conditions:
Pothos (Epipremnum aureum) — trails beautifully, tolerates near-darkness, and communicates clearly when it needs water by going slightly limp. The most forgiving plant I have ever grown and the one I recommend to every beginner without hesitation.
ZZ plant (Zamioculcas zamiifolia) — stores water in its thick rhizomes, which means it genuinely thrives on neglect. I went three weeks without watering mine last winter and it looked exactly the same on both ends of that gap.
Snake plant (Dracaena trifasciata) — architectural, dramatic, and almost impossible to kill in low light as long as you resist the urge to overwater it. One of the best plants for windowless bathrooms specifically.
Cast iron plant (Aspidistra elatior) — the name is not an exaggeration. Popular in Victorian-era homes precisely because it survived gas-lit rooms with almost no natural light.
Peace lily (Spathiphyllum) — one of the very few flowering plants that genuinely performs in low light. Wilts dramatically when it wants water which sounds alarming but is actually useful — it is essentially raising its hand to tell you something.
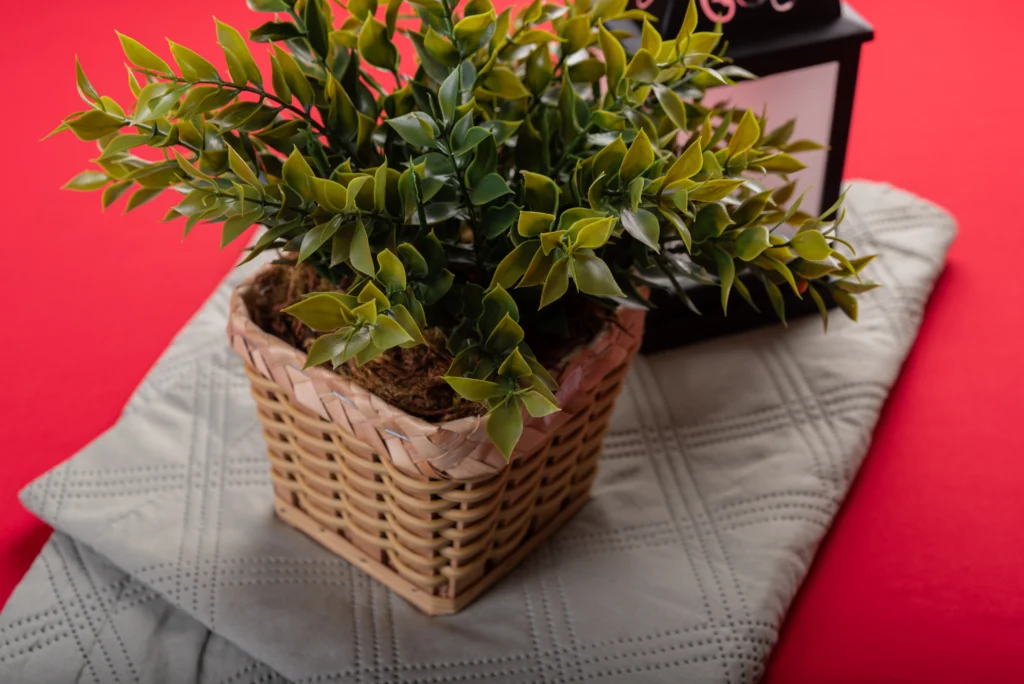
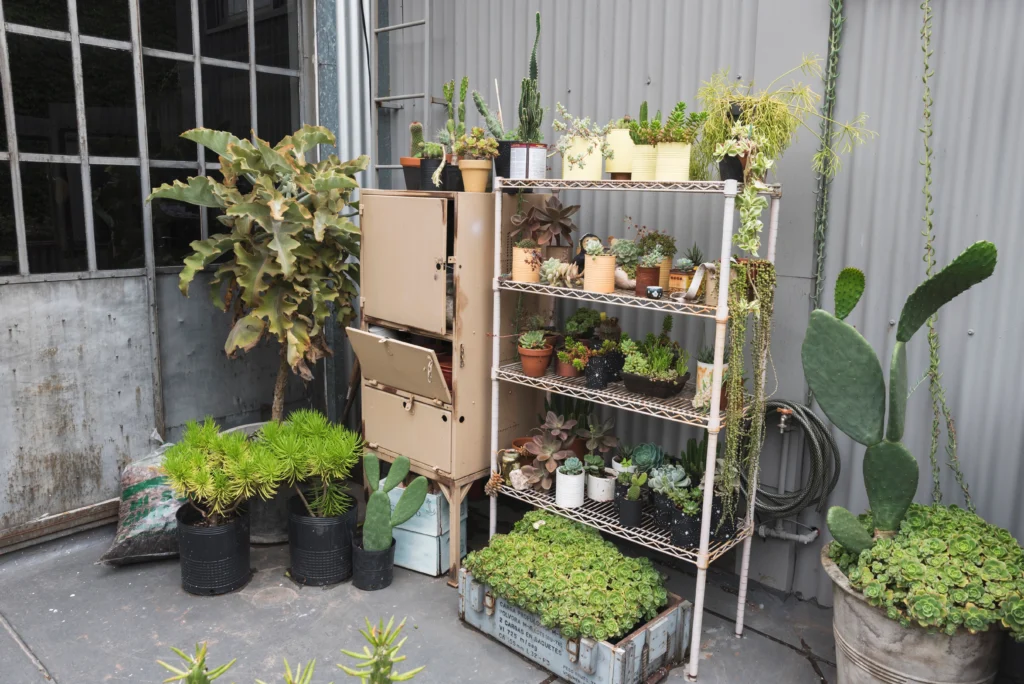
📍 Place image here — low light plant collection Alt text: how to take care of indoor plants without sunlight - ZZ plant snake plant and pothos arranged in a low light living room
If you want a wider vetted list beyond these five, my guide to the 7 common indoor house plants for beginners covers the species that genuinely succeed for people just starting out — with honest notes on what kills each one most often and which ones forgive the most beginner mistakes.
Tip 2 — Cut Your Watering Frequency in Half
📍 Place image here — finger soil test Alt text: how to take care of indoor plants without sunlight - finger pressed into pothos soil testing moisture level before watering
This is the tip that saves more plants in low-light situations than any other. Whatever watering schedule you were using before — weekly, every five days, every ten days — throw it out completely. In low light, water is the thing most likely to kill your plant, not save it.
The only rule that works: water only when the top one to two inches of soil feel completely dry when you push your finger in. Not slightly dry. Completely dry.
For most low-light plants in a typical home that translates to watering every ten to fourteen days in summer and stretching to every eighteen to twenty-one days in winter when growth slows further and the soil holds moisture even longer.
Sarah kept killing her pothos in her north-facing London flat no matter what she tried. She had good drainage, good soil, a decent spot near the window. The problem was she watered every Sunday without checking the soil first. She made one change — stopped the schedule entirely and switched to the finger test only. Her next pothos has been alive for fourteen months in the same spot. Same room. Same window. Different watering habit.
A soil moisture meter is worth every penny in low-light setups. I use one that cost about eight dollars and it has removed all the guesswork completely. You push it into the soil and it tells you wet, moist, or dry on a simple dial. For beginners especially it is the single most useful tool you can buy.
Tip 3 — Fix Your Soil and Drainage Before Anything Else
📍 Place image here — perlite soil mix Alt text: how to take care of indoor plants without sunlight - well draining potting mix with perlite for indoor plants in low light
You can do everything else right and still lose plants to root rot if your soil holds too much moisture or your pot has no drainage hole. In low-light conditions this problem is amplified because the soil stays wet so much longer between waterings.
For low-light plants specifically use a potting mix that contains perlite — those small white volcanic granules that create air pockets in the soil and prevent compaction. Standard all-purpose potting mix alone is too dense and holds moisture too long when a plant is using barely any water.
My current mix for all low-light plants is two parts standard potting compost to one part perlite. I mix it myself in an old bucket. It drains fast, dries evenly, and I have not lost a single plant to root rot since I switched about two years ago.
For pots, drainage holes are non-negotiable. A beautiful ceramic pot with no drainage hole is a root rot trap in a low-light room. If you love the look of a particular ceramic pot, use it as a decorative outer sleeve and keep your plant in a plain plastic nursery pot with holes sitting inside it. Best of both worlds — the aesthetic you want without the drainage problem.
For a deeper breakdown of which soil mixes work best for specific plants, my guide on indoor plant care tips covers ten practices I rely on consistently across all my plants — including the repotting and soil mistakes I stopped making after losing too many plants to them.
Tip 4 — Add a Grow Light If You Have Zero Natural Light
📍 Place image here — grow light setup Alt text: how to take care of indoor plants without sunlight - full spectrum LED grow light positioned above pothos on indoor shelf
If your room gets genuinely no natural light at all — a windowless bathroom, an interior office, a basement — a grow light is not optional. It is the difference between a plant that survives long-term and a plant that slowly declines over six months until you quietly throw it away wondering what went wrong.
The good news is that grow lights are far more beginner-friendly and affordable than most people expect. Here is what actually matters:
Get a full-spectrum LED. Full-spectrum means it produces both the red and blue wavelengths that plants use for photosynthesis. These look like regular white light rather than the purple-pink lights you may have seen in photos. Full-spectrum LEDs work for virtually all common low-light houseplants without any additional adjustments.
Position it six to twelve inches above the plant canopy. Distance matters more than wattage for most beginners. Too far and the plant gets almost no benefit. Too close and the leaves bleach or develop crispy edges. I set mine at ten inches and check the leaves after the first week — if anything looks off I adjust from there.
Run it ten to twelve hours per day on a timer. A basic plug-in timer costs about five dollars and removes all the guesswork. I have mine set to turn on at seven in the morning and off at seven in the evening. Plants respond better to a consistent light schedule than to random switching on and off.
Rotate your plants every ten to fourteen days so all sides get even exposure. Without rotation the side facing away from the light stretches toward it and the plant becomes lopsided over several weeks.
For specific product recommendations and a full setup walkthrough from someone who made every beginner mistake first, my complete guide to LED grow lights for indoor plants covers everything from budget clip-on lights for single plants to panel setups for a full shelf — with honest notes on which price points are actually worth it.
Tip 5 — Clean Your Leaves Every Few Weeks
This one sounds minor until you understand why it matters specifically in low-light conditions.
In a bright room a plant receives so much light that a thin layer of dust on its leaves makes almost no practical difference. In a low-light room where every bit of available light counts, dusty leaves are measurably less efficient at capturing what little light reaches them. The dust physically blocks the leaf surface that would otherwise be absorbing light.
Wipe your plant’s leaves gently with a damp cloth every three to four weeks. Plain room-temperature water is all you need — no leaf shine products, no soap, nothing added. Work from the base of the leaf toward the tip and support the leaf from underneath with your other hand so you are not putting stress on the stem connection.
I do this during my monthly plant check and it takes about five minutes for six plants. The difference in how the leaves look afterward is immediately noticeable — they develop a slight natural sheen and the green looks deeper and richer. More importantly the plant is now absorbing every bit of available light rather than filtering it through a layer of dust.
Tip 6 — Manage Humidity Without Creating Mold Problems
Low-light rooms, particularly in winter, tend toward dryness. Many popular low-light plants — pothos, peace lilies, calatheas — originally come from humid tropical environments and grow noticeably better with some humidity support.
The safest way to raise humidity without creating problems is grouping plants together. Plants release moisture through their leaves as part of normal transpiration and a cluster of plants creates a slightly more humid microclimate around itself naturally. No equipment needed.
A pebble tray with water sitting underneath the pot also works well. The water evaporates upward around the plant without the soil sitting in standing water — which would cause the exact root rot problems you are trying to avoid.
What to avoid without question: misting directly onto leaves in a low-light, low-airflow room. Wet leaves that cannot dry quickly in dim conditions are a straightforward invitation for fungal issues. I misted a calathea in my windowless bathroom daily for two weeks and developed grey mold spots on three leaves before I connected what was causing it. Stopped misting, problem cleared within ten days, never went back to that method.
Tip 7 — Read Your Plant’s Warning Signs Early
📍 Place image here — leggy vs healthy plant Alt text: how to take care of indoor plants without sunlight - leggy etiolated pothos compared to healthy compact pothos under grow light
Low-light plant care gets much easier when you know what your plant is trying to tell you before the situation becomes serious. These are the five warning signs worth knowing and what each one actually means:
Pale yellow leaves spreading across the whole plant — almost always overwatering in low-light conditions. Check the roots immediately. Brown mushy roots confirm rot — trim back to healthy tissue, let the plant dry completely, and repot in fresh well-draining mix.
Long stretched stems with large gaps between leaves — this is called etiolation and it means the plant is physically reaching for more light than it is receiving. Move it closer to your light source or introduce a grow light. Trimming the leggy stems back to just above a leaf node encourages bushier compact regrowth.
New leaves coming in noticeably smaller than older ones — the plant does not have enough energy to produce full-sized leaves. Usually a light problem. Occasionally a nutrient issue in plants that have been sitting in the same soil for over a year without any fertilizing.
Soil still wet two weeks after the last watering — your drainage is not working or your pot has no holes. Unpot the plant, check the roots, and repot in a faster-draining mix with added perlite.
Plant leaning dramatically toward one side — rotating a quarter turn every one to two weeks fixes this completely and prevents the lopsided growth from becoming permanent.
Simple Weekly Care Routine for Low-Light Homes
This is the exact routine I follow. Nothing complicated, nothing that takes more than a few minutes.
Every three to four days: Push your finger into the soil up to the first knuckle. Completely dry means watering is coming soon. Still moist means leave it completely alone.
Once a week: Check for yellowing leaves and remove any dead ones cleanly with scissors. Rotate the plant a quarter turn.
Every two weeks: Water thoroughly only if the top inch and a half of soil is dry. Water until it runs freely out of the drainage hole then let it drain completely before putting the saucer back underneath.
Once a month: Wipe all leaves with a damp cloth. Check drainage holes are not blocked with compacted soil. If using a grow light check that the distance is still correct — plants grow toward the light over time and may have crept closer without you noticing.
Every three months: Lift the plant out of its pot and look at the roots. Healthy roots are white or light tan and firm to the touch. Dark mushy roots mean rot — trim back to healthy tissue with clean scissors and repot immediately in fresh mix.
For a broader set of habits that apply across every plant in your home regardless of light level, my guide to indoor plant care tips covers ten practices worth building into your routine from the start — including the seasonal adjustments most beginners skip entirely.
Best Spots in Dark Rooms and Basements
Not all dark spots behave the same way. A few placement specifics that made a real difference in my experience:
In a basement, place plants directly under a grow light rather than near a wall. There is no ambient natural light to supplement in a basement so proximity to the light source is everything.
In a north-facing room, position plants as close to the window as physically possible even though the light coming through is indirect. The difference between three feet from the window and ten feet from the window is significant in low-light conditions even when it does not look significant to the human eye.
In a windowless bathroom, a grow light on a timer running twelve hours a day combined with the natural humidity from regular showers makes a surprisingly effective plant environment. My snake plant has lived in my windowless bathroom for two years and has put out four new leaves in that time.
Avoid placing plants directly against cold concrete walls in basements. The temperature at the wall surface is consistently lower than the room temperature and that cold stress affects root function even when the plant looks healthy on the surface.
Frequently Asked Questions
Can indoor plants survive without sunlight?
No plant survives in complete permanent darkness — but that is not what most people are dealing with. In rooms with low or indirect light, the right plant species will grow steadily and look healthy with the adjustments covered in this guide. ZZ plants and snake plants are the most tolerant of genuinely dim conditions. If your room has zero natural light of any kind, a full-spectrum LED grow light running ten to twelve hours daily gives most common houseplants everything they need to grow normally.
Why does my plant keep dying in a dark room?
Ninety percent of the time the answer is overwatering. Plants in low light use dramatically less water than plants in bright conditions and most people continue watering on the same fixed schedule regardless of light level. Check your soil before every single watering and water only when the top inch and a half is completely dry. If your plant is already declining, unpot it and check the roots. Mushy dark roots confirm rot and the plant needs to be trimmed back to healthy tissue and repotted in fresh fast-draining soil immediately.
How do I know if my plant needs more light?
Watch for pale yellowing leaves, stretched leggy stems with large gaps between leaves, new leaves coming in smaller than existing ones, and the plant leaning dramatically toward any available light source in the room. Seeing two or more of these signs together is a clear signal that light is the limiting factor. Either move the plant closer to your existing light source or introduce a grow light and monitor the response over the following two to three weeks.
Is a grow light worth it for just one plant?
Yes — and they are much cheaper than most people expect. A basic clip-on full-spectrum LED suitable for one to two plants costs around ten to fifteen dollars and will run reliably for years. If you have a plant you genuinely like sitting in a spot that gets no natural light, a grow light is a far better investment than replacing a dead plant every few months. The setup takes about five minutes and a plug-in timer makes the whole thing automatic.
How often should I water plants in a low-light room?
Stop using a fixed schedule entirely — it is the single most common reason low-light plants die. Water only when the top one to two inches of soil are completely dry when tested with your finger. In practice that usually means every ten to fourteen days in summer and every eighteen to twenty-one days in winter for most low-light plants. A soil moisture meter costs less than a coffee and removes the guesswork completely if you find the finger test unreliable.
Do low-light plants need fertilizer?
Yes but far less than plants growing in bright light. A plant growing slowly in low light needs very little additional nutrition — I fertilize my low-light plants once every six to eight weeks in spring and summer using a balanced liquid fertilizer at half the recommended dose. In autumn and winter I stop fertilizing entirely. Over-fertilizing a slow-growing plant in low light causes salt buildup in the soil which burns the roots and looks identical to overwatering damage on the surface.
Final Thoughts
Learning how to take care of indoor plants without sunlight comes down to one fundamental shift in thinking — stop treating low-light plants like they are in a sunny window. Everything else follows from that. Water less. Drain better. Pick the right plants from the start. Add a grow light if you have genuinely no natural light at all.
The dead pothos in my brick-wall apartment was not killed by darkness. It was killed by me refusing to adjust my habits to match the conditions I actually had. Once I made those adjustments every plant I have kept in low light since then has survived — most of them for years.
Start with one plant. Follow this routine. Build from there. A dark room does not have to mean a plant-free room.
This article is for informational purposes only. Plant care outcomes vary depending on specific environmental conditions. For species-specific advice, consult a certified horticulturalist or your local plant nursery.
Image Credit
All images used in this article are sourced from Freepik and are licensed for free use under the Freepik free license. Original creators are credited to their respective authors on Freepik.com. Visit freepik.com for full licensing details. All trademarks and brand names referenced in this article remain the property of their respective owners.
If you’re just getting started with low-light plant care, don’t miss these beginner-friendly resources:
- LED Grow Lights for Indoor Plants: Complete Beginner Guide – Learn how artificial lighting can replace natural sunlight for healthy plant growth.
- 7 Common Indoor House Plants: Easy Guide for Beginners – Discover low-maintenance plants that thrive in typical home environments.
- Indoor Plant Care Tips: 10 Proven Ways That Actually Work – Practical watering, soil, and humidity tips for long-term success.
These guides will help you build a strong foundation and avoid common indoor gardening mistakes. - For more in-depth plant science and care recommendations, you can also refer to:
- Royal Horticultural Society – Evidence-based plant care advice
- University of Minnesota Extension – Research-backed indoor plant care guides
- These sources provide reliable, research-based information on plant health, lighting, and watering practi