How to Care for an Orchid Plant Indoors: Complete Step-by-Step Guide
Let me be honest with you — orchids have a reputation they don’t quite deserve.
Most people assume they’re fragile, high-maintenance, and basically impossible to keep alive indoors. But here’s what actually happens: people kill orchids not because orchids are hard to care for, but because they treat them like regular houseplants. They overwater them, stick them in dark corners, and wonder why the flowers drop within two weeks.
Here’s the truth — once you understand what an orchid actually needs, they’re surprisingly forgiving. My neighbor Margaret kept the same Phalaenopsis alive for six years on her kitchen windowsill with almost zero effort. No grow lights, no special equipment. Just the right habits from the start.
This guide covers everything — light, watering, humidity, fertilizing, repotting, post-bloom care, and the most common problems beginners run into. Whether you just brought your first orchid home or you’ve already killed a few, this is the guide that’ll actually stick.
Understanding Your Orchid Type (Start Here)
Before anything else, you need to know what kind of orchid you’re working with. Different types have different needs, and treating them all the same is where most people go wrong.
Phalaenopsis (Moth Orchid) — Best for Beginners
If you bought your orchid from a grocery store, garden center, or got one as a gift, there’s a very high chance it’s a Phalaenopsis — also called the moth orchid. This is by far the most common indoor orchid, and for good reason. It tolerates lower light better than most, blooms for months at a time, and adapts well to typical household conditions.
If you’re just starting your indoor gardening journey, you may also find our guide to common indoor house plants for beginners helpful for building confidence beyond orchids.
Phalaenopsis orchids have flat, wide leaves, aerial roots that sometimes creep out of the pot, and long arching flower spikes. If this sounds like yours, good news — you picked the easiest one to start with.
Dendrobium vs. Cattleya — Care Differences
Dendrobium orchids are slightly more light-hungry than Phalaenopsis and have a more distinct dormancy period. They go through a rest phase after blooming where they need less water and cooler temperatures to trigger new growth. Skip that rest period and you’ll wonder why yours never reblooms.
Cattleya orchids — the classic corsage orchid — need more light, more humidity, and stronger fertilization. They’re beautiful but less beginner-friendly. If you’re just starting out, stick with Phalaenopsis until you get your footing.
Ideal Light Conditions for Indoor Orchids
Light is probably the single most misunderstood part of orchid care. Too little and they won’t flower. Too much direct sun and the leaves scorch. It’s about finding the sweet spot.
How Much Sunlight Do Orchids Need Indoors?
Orchids need bright, indirect light — roughly 10 to 14 hours of ambient light per day. They don’t want harsh direct sunlight hitting their leaves, especially midday sun which can cause yellow or bleached patches almost overnight.
A good way to test: hold your hand about a foot above a white piece of paper in your chosen spot. If you see a sharp, strong shadow, the light is too intense. A soft, slightly blurry shadow is exactly what you’re looking for.
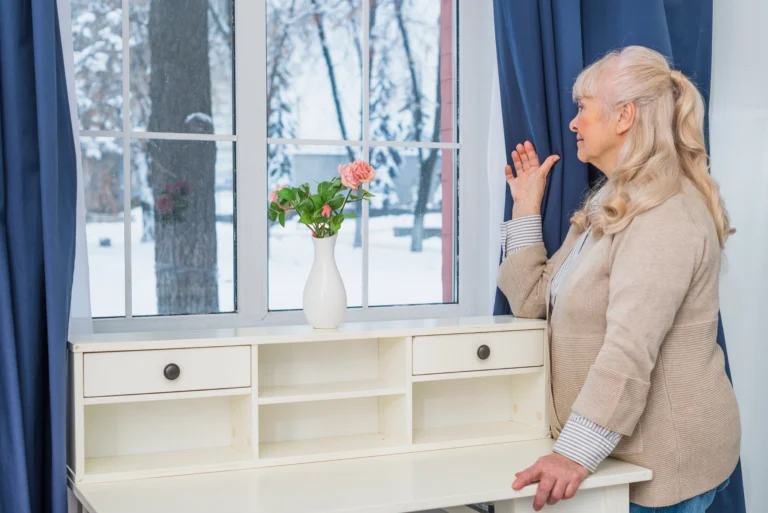
Best Window Placement for Orchids
East-facing windows are the gold standard for Phalaenopsis orchids. The morning light is gentle and the plants get a good few hours of soft, direct exposure without the heat and intensity of afternoon sun.
South-facing windows work well too, but you’ll likely need a sheer curtain to diffuse the light — especially in summer. North-facing windows are generally too dim for orchids to bloom consistently. West-facing works, but afternoon sun can run hot.
If you’re unsure, east-facing window with no obstruction is your safest bet.
Using LED Grow Lights for Orchids (Optional Setup)
If your apartment doesn’t get great natural light, a simple LED grow light can make a real difference. You don’t need anything fancy — a basic full-spectrum LED panel set on a 12-hour timer works well. Position it 6 to 12 inches above the plant and you’re essentially mimicking a good window. This is also useful in winter months when daylight hours shrink.
How Often to Water Orchids Indoors
This is where most beginners go wrong — almost always in the direction of too much water, not too little.
If you’re unsure how seasonal changes affect watering frequency, our detailed guide on watering indoor plants in winter explains how to adjust your schedule to prevent root rot and overwatering
Orchid Watering Schedule (Beginner Formula)
The general rule is to water once every 7 to 10 days in warmer months and once every 10 to 14 days in winter. But rather than watching the calendar, watch the roots. Healthy, hydrated roots look green. Roots that have dried out turn silvery-gray. When you see gray, it’s time to water.
The best method is the soak and drain approach. Take the pot to your sink, water it thoroughly until water runs freely out the drainage holes, let it drain completely, then put it back. Never let an orchid sit in standing water — that’s a fast track to root rot.
Signs You’re Overwatering or Underwatering
Overwatering signs: mushy roots, dark brown or black root tips, soggy potting medium that never seems to dry out, and yellowing lower leaves.
Underwatering signs: wrinkled or slightly limp leaves, silvery-gray roots that stay that color even after watering (damaged roots may not recover), and a very lightweight pot.
The pot weight trick is useful — lift your orchid right after watering and notice how heavy it feels. Check it a week later. When it feels noticeably lighter, it’s usually ready to water again.
Best Water Type for Orchids
Orchids prefer rainwater or distilled water. Tap water is usually fine but in areas with heavily chlorinated or fluoride-heavy water, you might notice leaf tip browning over time. If you’re using tap water, let it sit overnight before using it — this allows some of the chlorine to dissipate. Avoid softened water, which contains sodium that builds up in the potting mix and damages roots.
Humidity & Temperature Requirements
Ideal Indoor Humidity for Orchids
Orchids like humidity levels between 50% and 70%. Most homes hover around 30% to 40%, especially in winter with heating running. The fix doesn’t have to be complicated.
A humidity tray works well — fill a shallow tray with pebbles, add water just below the top of the pebbles, and set the orchid pot on top. As the water evaporates, it creates a more humid microclimate around the plant. Just make sure the pot itself isn’t sitting in water.
Grouping plants together also helps — plants naturally release moisture as they transpire, so clustering them raises the ambient humidity slightly.
Orchid Temperature Range
Most indoor orchids — Phalaenopsis especially — prefer daytime temperatures between 65°F and 80°F (18°C to 27°C) and nighttime temperatures around 55°F to 65°F (13°C to 18°C).
That 10 to 15 degree drop at night is actually important. It’s one of the key triggers for reblooming. In fact, placing your orchid near a slightly cool window in autumn can often kickstart a new flower spike after dormancy.
Airflow Needs (Preventing Crown Rot)
Good air circulation matters more than most guides mention. Stagnant, humid air with no movement creates the perfect environment for fungal issues and crown rot — which is when water collects in the center of the plant and causes the growing point to rot.
A small fan set on low nearby, or simply cracking a window occasionally, is usually enough. If you’re misting your orchid (which honestly most indoor orchids don’t need), make sure the center of the plant doesn’t stay wet.
Best Potting Mix & Repotting Guide
Orchid Bark Mix vs. Sphagnum Moss
Orchids need a potting medium that drains fast and allows air to reach the roots. Standard potting soil is too dense and will suffocate them. The two most popular options are orchid bark mix and sphagnum moss.
Orchid bark (fir bark) is the most widely used. It’s chunky, drains well, and mimics the tree bark that many orchids grow on in the wild. Sphagnum moss retains more moisture, which can work well in very dry environments but requires more careful watering to avoid overwatering.
For beginners, a premixed orchid bark blend from a garden center is the easiest starting point.
When to Repot Orchids
Repot every 1 to 2 years, or when you notice the bark breaking down and becoming dense, roots escaping aggressively over the pot rim, or the plant tipping over due to top-heaviness.
The best time to repot is right after flowering ends and before new root growth begins. Spring is typically ideal. When repotting, trim any dead or mushy roots with sterilized scissors, let the cut ends dry for an hour, then place in fresh bark in a pot just one size up.
Transparent Orchid Pots — Do They Help?
They genuinely do. Clear plastic pots let you see the roots without disturbing the plant, which makes it much easier to judge when to water and spot problems early. Many serious orchid growers use them exclusively. You can slip them inside a decorative ceramic pot if you prefer the look — just remove the decorative pot when watering.
Fertilizing Indoor Orchids Properly
Orchid Fertilizer Schedule
The most practical fertilizing approach is “weakly, weekly” — meaning use a diluted fertilizer solution (usually quarter to half the recommended strength) once a week during the growing season (spring through fall). Reduce to once a month in winter when growth slows.
Always water the plant first before applying fertilizer. Fertilizing dry roots can cause chemical burn.
Best NPK Ratio for Orchids
During active growth, a balanced fertilizer like 20-20-20 works well. When you’re trying to encourage blooming, switch to a bloom booster with a higher phosphorus content — something like 10-30-20. Phosphorus supports root development and flower production.
Bloom Boosters — Are They Necessary?
Not essential, but they can help. If your orchid is healthy, getting good light, and experiencing that nighttime temperature drop, it will likely rebloom on its own. Bloom boosters are more of a helpful nudge than a requirement.
Orchid Care After Flowering
Trimming Orchid Stems Correctly
Once all the flowers drop, look at the flower spike. If it’s still green, you can trim it back to just above a node (a small brown bump on the stem) — sometimes a secondary spike will grow from there. If the spike turns yellow or brown and dry, cut it down to the base. A dead spike won’t produce more flowers.
Orchid Dormancy Period Explained
After blooming, orchids enter a rest phase. This is completely normal and not a sign that something is wrong. During dormancy, the plant focuses energy on root and leaf growth rather than flowering. This phase can last anywhere from a few weeks to several months.
How to Make Orchids Bloom Again Indoors
The three most reliable bloom triggers are: bright indirect light, a 10 to 15 degree difference between day and night temperatures, and consistent fertilizing through the growing season. In late summer or early autumn, moving your orchid to a slightly cooler windowsill for a few weeks often does the trick.
Common Orchid Problems & Solutions
Orchid Diagnosis Quick-Check Chart
| Symptom | Likely Cause | Fix |
|---|---|---|
| Yellow leaves (lower) | Overwatering or natural aging | Improve drainage, reduce watering frequency |
| Yellow leaves (upper) | Too much direct sun | Move to indirect light |
| Wrinkled, limp leaves | Underwatering | Water thoroughly, check root health |
| No blooms after rest period | Insufficient light or no temp drop | Brighter spot, cooler nights |
| Black or mushy roots | Root rot from overwatering | Repot, trim dead roots |
| White cottony patches | Mealybugs | Wipe with isopropyl alcohol |
| Tiny flies around soil | Fungus gnats | Allow medium to dry more; use sticky traps |
| Brown leaf tips | Fluoride/salt buildup or low humidity | Use filtered water, flush soil occasionally |
Orchid Root Rot Treatment
Remove the plant from its pot, rinse the roots gently, and cut away any black, mushy, or hollow roots with sterilized scissors. Let the roots air dry for an hour, dust cuts lightly with cinnamon (a natural antifungal), then repot in fresh bark. Adjust your watering going forward.
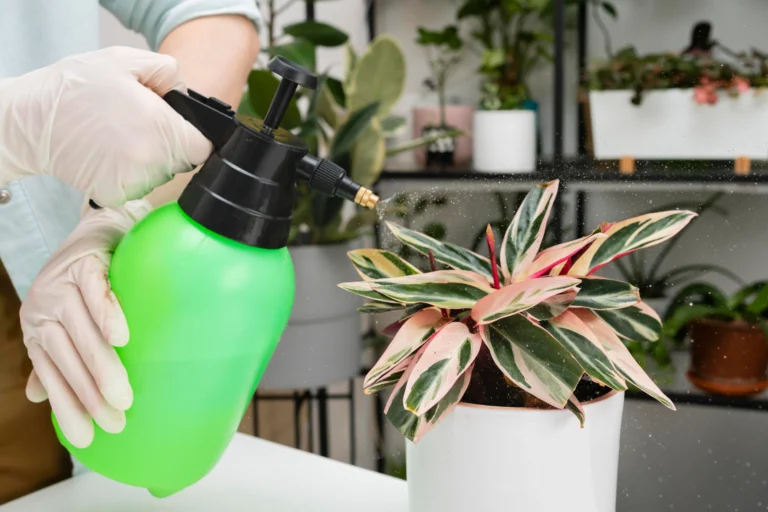
Pests Indoors — Mealybugs & Fungus Gnats
Mealybugs show up as white, cottony clusters — usually in leaf joints or on roots. Dab them with a cotton swab dipped in 70% isopropyl alcohol. For larger infestations, a diluted neem oil spray applied every few days works well.
Fungus gnats breed in consistently moist potting medium. The fix is simple — let the bark dry out more between waterings. Sticky yellow traps catch the adults while you deal with the moisture issue.
Beginner Mistakes to Avoid
Several common habits will quietly kill an orchid before you realize what’s going wrong:
Misting the leaves feels like good care but doesn’t actually help most indoor orchids. Water sitting in the crown of the plant or on leaves in low airflow conditions causes rot and fungal spots. Use a humidity tray instead.
No drainage holes is a silent killer. Water pooling at the bottom of a pot without drainage leads straight to root rot. Always use a pot with holes.
Over-fertilizing — more is not better. Salt buildup from excess fertilizer damages roots. Stick to the weakly, weekly method and flush the pot with plain water once a month to clear any accumulation.
Low light placement is probably the most common issue. Orchids on bookshelves across the room from a window, or on bathroom counters with no natural light, will survive but never flower. Light drives blooming.
Recommended Tools for Indoor Orchid Care
Getting a few basics in place makes the whole process much easier:
A balanced orchid fertilizer (20-20-20) for growing season and a bloom booster (10-30-20) for pre-flowering. Look for water-soluble options for easiest application.
A humidity tray with pebbles keeps moisture levels consistent without over-complicating things. Wide, shallow trays work better than deep ones.
A full-spectrum LED grow light on a simple timer is worth it if your home doesn’t get great natural light, especially in winter months.
Orchid bark mix from a reputable garden brand — avoid generic potting soil entirely.
Transparent plastic orchid pots so you can monitor root health and moisture levels without guessing.
FAQ Section
How often should I water my orchid indoors? Water every 7 to 10 days in spring and summer, and every 10 to 14 days in fall and winter. Watch the roots — gray means it’s time to water. Always let the pot drain completely before putting it back in place.
Why are my orchid leaves turning yellow? Lower leaves yellowing naturally as they age is normal. If upper or middle leaves are turning yellow, it’s usually overwatering, too much direct sun, or in some cases a nutrient deficiency. Check your watering frequency and drainage first.
How much sunlight do orchids need indoors? Bright, indirect light for 10 to 14 hours a day is ideal. East-facing windows are the best natural option. Avoid harsh midday sun which can scorch leaves.
Can orchids survive in low light rooms? They can survive, but they won’t bloom reliably. Flowering requires adequate light. If your space is genuinely low-light, a grow light is the practical solution.
How do I make my orchid bloom again? Ensure it’s getting bright indirect light, fertilize regularly through the growing season, and expose it to cooler nighttime temperatures (around 55°F to 65°F) for a few weeks in autumn. These three factors consistently trigger reblooming.
Should I mist my indoor orchid? Generally no — misting doesn’t meaningfully raise humidity and can cause crown rot or leaf spotting if water sits in the wrong places. A pebble humidity tray is a better and safer option.
What is the best potting mix for orchids? A chunky orchid bark mix designed specifically for orchids. It drains quickly and allows air to the roots, which is essential. Never use regular potting soil — it stays too wet and suffocates the root system.
Disclaimer:
This content is for informational purposes only and based on personal research and gardening experience. Plant care results may vary depending on environment, climate, and plant condition. Always adjust care routines based on your specific indoor conditions.
For full details, please read our [Disclaimer Page].
Image Credit Notice:
Some images used in this article are sourced from Freepik and are used under their license terms. All images are either royalty-free, licensed appropriately, or used with proper attribution where required.
We respect intellectual property rights. If you believe any content or image needs correction, please contact us.
For additional expert care tips and seasonal orchid care advice, check out the American Orchid Society’s orchid care guide — a trusted resource for growers of all levels
The Royal Horticultural Society also offers valuable guidance on indoor orchid variety care, including light preferences and watering recommendations