How to Keep a Lily Plant Alive Indoors
I’ll never forget the first time I brought home a gorgeous Easter lily from the nursery. Within two weeks, the leaves were yellowing, the blooms had dropped, and I was left staring at a sad, drooping plant wondering what went wrong. Sound familiar?
If you’re struggling to figure out how to keep a lily plant alive indoors, you’re definitely not alone. After two decades of growing plants professionally and making just about every mistake possible, I’ve learned that indoor lilies aren’t actually difficult—they just have specific needs that differ from other houseplants.
In this complete indoor lily plant care guide, I’ll walk you through everything you need to know to keep your lily thriving, blooming, and looking absolutely stunning in your home. No jargon, no complicated techniques—just practical advice that actually works.
Indoor Lily Plant Care Guide for Beginners
Let’s start with the basics. When we talk about indoor lilies, we’re usually referring to a few popular varieties: Asiatic lilies, Oriental lilies, Easter lilies, and peace lilies (though technically, peace lilies aren’t true lilies—they’re in a different plant family entirely).
True lilies grow from bulbs and have that classic trumpet-shaped flower we all recognize. They’re not naturally indoor plants, which is why so many people struggle with them. In the wild, these beauties grow outdoors with plenty of air circulation, natural rainfall, and seasonal temperature changes.
Here’s what you need to understand right from the start: your lily arrived at your home already stressed. It was forced to bloom in a greenhouse, shipped in a box, and suddenly found itself in your living room with completely different conditions. Your job isn’t to replicate nature perfectly—it’s to create an environment where your lily can adjust and thrive.
The good news? Once you understand what lilies actually need, they’re surprisingly forgiving. I’ve rescued dozens of “dying” lilies that bounced back beautifully with just a few adjustments.
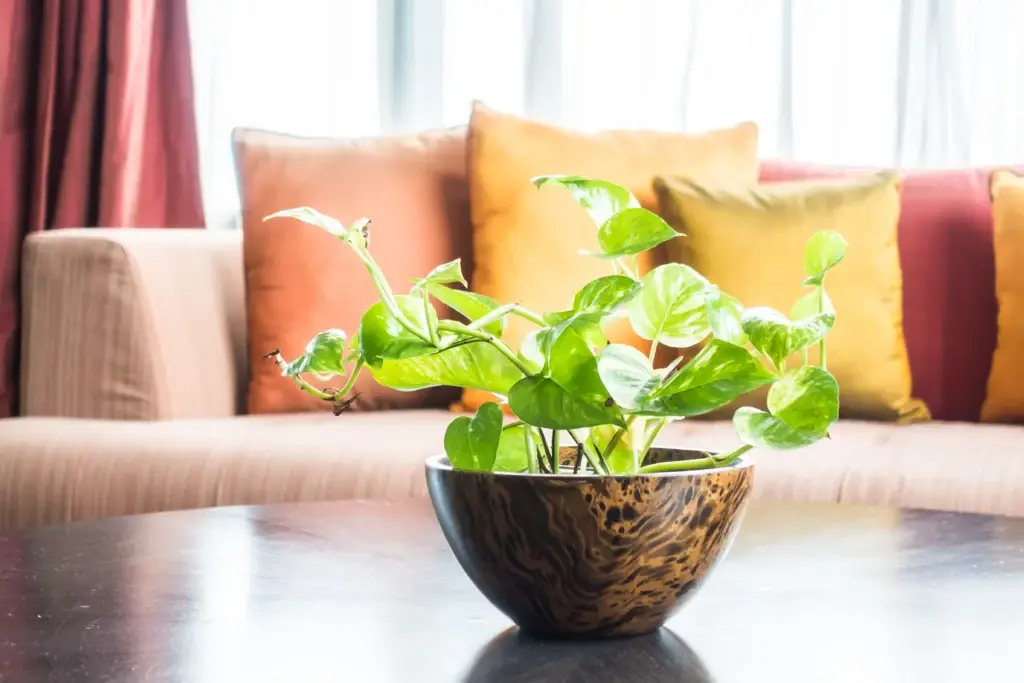
[Image Prompt: Healthy indoor lily in bright room]
Alt-text: Healthy indoor lily plant in bright living room
Best Light for Indoor Lily Plants
This is where most beginners get it wrong. They assume lilies need constant direct sunlight because they’re “flowering plants.” Not true.
Indoor lilies need bright, indirect light for most of the day. Think of a spot near a window where the light is strong but filtered—maybe with a sheer curtain, or a few feet back from the window itself.
Here’s my simple light test: stand where you’re thinking of placing your lily around noon. Can you read a book comfortably without straining your eyes? That’s about the right light level. If you need to squint or the space feels dim, it’s not enough light. If the sun is hitting you directly and feels hot on your skin, that’s too much.
Common Light Mistakes I See All the Time
Mistake #1: Placing the lily in a dark corner because “it’s pretty there.” Your lily will stretch toward any available light, become leggy, and eventually stop blooming altogether.
Mistake #2: Sticking it right on a south-facing windowsill where it gets blasted by afternoon sun. The leaves will develop brown, crispy edges, and the flowers will fade super quickly.
Mistake #3: Moving the plant constantly to “share the light.” Lilies hate being moved. Pick a spot and leave it there.
I keep my indoor lilies about 3-4 feet from an east-facing window. They get gorgeous morning light, which is gentler than afternoon sun, and they stay happy all season long. If you only have west or south-facing windows, pull the plant back from the glass or use a light curtain.
During winter months when natural light is scarce, I’ve had great success using a simple grow light for 6-8 hours daily. Just a basic LED grow bulb in a desk lamp works perfectly—no need for expensive equipment.
Indoor Lily Watering Schedule
Here’s the truth about how often to water indoor lily: there’s no magic number of days. I know that’s frustrating to hear, but watering on a fixed schedule is actually the fastest way to kill your plant.
Instead, you need to learn to read what your lily is telling you. Stick your finger about two inches into the soil. If it feels dry at that depth, it’s time to water. If it still feels moist, wait another day or two and check again.
How I Water My Indoor Lilies
When it’s time to water, I take the plant to my kitchen sink and water thoroughly until water runs out the drainage holes. This ensures the entire root system gets moisture, not just the top inch of soil. Then I let it drain completely—and I mean completely. I usually let it sit in the sink for 15-20 minutes before returning it to its decorative pot or saucer.
Here’s what happens when you water correctly: the soil absorbs moisture evenly, the roots stay healthy, and your lily maintains those deep green leaves and vibrant blooms.
Overwatering Lily Signs (Trust Me, I’ve Seen Them All)
- Yellow leaves that feel soft and mushy
- Soil that stays wet and never seems to dry out
- A sour or musty smell coming from the pot
- Brown, soggy roots if you check underneath
- Leaves dropping off even though they’re still green
[Image Prompt: Overwatered lily with yellow leaves]
Alt-text: Yellow leaves on overwatered indoor lily plant
Most beginners overwater because they’re worried about their plant drying out. But here’s the reality: lilies can bounce back from slight underwatering way more easily than from overwatering. Overwatered roots start to rot, and once that happens, it’s extremely difficult to save the plant.
During active growing and blooming periods (spring and summer), you’ll probably water every 3-5 days. In fall and winter, especially if your lily has died back to its bulb, you might water only once every 2-3 weeks.
One more critical tip: never let your lily sit in standing water. Empty that saucer every single time after watering. Those wet roots are a death sentence.
Right Soil and Pot for Lily
The best pot for indoor lily needs two things: drainage holes and the right size. I cannot stress the drainage holes enough. Without them, you’re basically creating a swamp at the bottom of your pot, which leads to root rot almost every time.
Size-wise, your pot should be about 2 inches wider than the bulb on all sides. Too big, and the soil stays wet too long. Too small, and the roots get cramped and your lily won’t bloom well.
The Perfect Lily Soil Mix Indoors
Regular potting soil is usually too heavy for lilies. They need something that drains well while still holding some moisture. Here’s the lily soil mix indoors that I use:
- 2 parts quality potting mix
- 1 part perlite or coarse sand
- 1 part peat moss or coconut coir
If mixing your own sounds like too much work, look for a potting mix labeled for bulbs or flowering plants. Just add a handful of perlite to improve drainage, and you’re good to go.
The goal is soil that feels light and airy when you squeeze it, not dense and muddy. When you water, it should absorb moisture quickly and drain within a few minutes.
I learned this lesson the hard way when I planted an expensive Oriental lily in regular garden soil. Within a month, the bulb had rotted completely. Now I’m obsessive about proper soil drainage, and I haven’t lost a lily to root rot since.
Repotting Lily Plant Indoors
You’ll need to repot when you notice roots growing out the drainage holes or when the plant becomes top-heavy and tips over easily. For most lilies, this is every 1-2 years.
The best time for repotting lily plant indoors is right after blooming finishes, or in early spring before new growth starts. Here’s my simple process:
- Gently remove the plant from its old pot
- Shake off loose soil and inspect the bulb and roots
- Trim any dead or mushy roots with clean scissors
- Place fresh soil mix in the new pot (about 2-3 inches deep)
- Set the bulb so the tip is about 1 inch below the soil surface
- Fill around the bulb with more soil mix, leaving an inch at the top for watering
- Water thoroughly and let it drain
After repotting, keep your lily out of direct sunlight for a few days while it adjusts to its new home.
Temperature and Humidity for Healthy Lily
The indoor lily temperature range is pretty forgiving, which is great news. Lilies do well in typical household temperatures between 60-75°F (15-24°C). They can handle slightly cooler temps at night, which actually helps with blooming.
What they hate are extreme temperature swings. Don’t place your lily near heating vents, air conditioning units, or drafty windows. That blast of hot or cold air will stress the plant and cause bud drop.
Does Your Lily Need Extra Humidity?
This is where lily plant humidity becomes important. Most indoor environments are drier than lilies prefer, especially during winter when heating systems run constantly. You’ll notice the leaf tips turning brown if the air is too dry.
I don’t bother with complicated humidity trays or expensive humidifiers. Instead, I simply group my plants together. Plants naturally release moisture through their leaves, so when you cluster them, they create their own little humid microclimate.
If you only have one lily, try placing it in a bathroom with a window. The natural humidity from showers works wonders. Just make sure it still gets enough light.
Quick humidity boost: mist the leaves lightly with room-temperature water every few days. Don’t mist the flowers, though—that can cause them to brown and fade faster.
Common Indoor Lily Problems and Solutions
Let’s troubleshoot the issues I hear about most often. Chances are, you’re dealing with one of these right now.
Yellow Leaves on Lily
Not all yellow leaves mean disaster. It’s totally normal for the bottom one or two leaves to yellow and drop as the plant ages. But if you’re seeing widespread yellowing, here’s what’s usually happening:
Overwatering: If the leaves are yellow and soft, check the soil moisture. Is it constantly wet? Cut back on watering immediately and make sure your pot has drainage holes.
Underwatering: Yellow leaves that feel dry and crispy usually mean the plant is too thirsty. Water thoroughly and consider increasing your watering frequency slightly.
Natural die-back: After blooming, lily leaves naturally yellow and die back as the bulb goes dormant. This is completely normal—don’t panic.
Indoor Lily Not Blooming
This is heartbreaking, I know. You bought the plant for those gorgeous flowers, and now you’re just staring at green leaves.
Not enough light: This is the number one reason. Move your lily to a brighter location.
Wrong fertilizer: Lilies need phosphorus to bloom. Use a fertilizer with a higher middle number (like 10-20-10) during the growing season.
No rest period: Many lilies need a dormancy period with cooler temps and less water to trigger blooming again. After the leaves die back, store the pot in a cool, dark place (like a garage) for 8-12 weeks.
The bulb is exhausted: Sometimes, bulbs that were forced to bloom in greenhouses just don’t have the energy to bloom again indoors. This isn’t your fault—it’s just the nature of forced bulbs.
[Image Prompt: Indoor lily blooming in apartment]
Alt-text: Indoor lily plant blooming in home environment
How to Save a Dying Lily Plant
I’ve rescued so many “hopeless” lilies. Here’s my emergency protocol:
- Check for root rot by gently removing the plant and inspecting the roots
- If roots are brown and mushy, trim off all dead roots with sterilized scissors
- Repot in fresh, well-draining soil
- Cut back on watering and only water when the top 2 inches of soil are dry
- Move to bright, indirect light
- Remove any completely dead leaves or stems
- Be patient—recovery takes weeks, not days
Even if all the leaves die back, don’t give up. As long as the bulb is still firm, it can regrow.
How to Make Lily Bloom Indoors
Getting repeat blooms indoors takes a bit of strategy, but it’s absolutely doable. I’ve had the same lily bulbs bloom for three consecutive years.
Indoor Lily Fertilizer Tips
During the growing season (spring and summer), feed your lily every 2-3 weeks with a balanced liquid fertilizer diluted to half strength. Once buds appear, switch to a bloom-boosting fertilizer (that’s the one with the higher middle number).
Stop fertilizing completely once the flowers fade. The bulb needs to rest and store energy for next year’s blooms.
I use an organic fish emulsion fertilizer because it’s gentle and hard to overdo. Chemical fertilizers work fine too, but if you accidentally use too much, you’ll burn the roots. Always err on the side of less fertilizer rather than more.
Creating the Right Conditions for Blooming
After your lily finishes blooming, keep watering and let the leaves die back naturally. They’re sending energy back to the bulb. Once the foliage is completely yellow, cut it off at soil level and stop watering almost entirely.
Store the pot in a cool spot (40-50°F is ideal) for 8-12 weeks. This mimics winter and tricks the bulb into thinking a new growing season is coming.
After the rest period, bring the pot back into warmth and light, and resume regular watering. New growth should appear within a few weeks, followed by buds 8-10 weeks later.
It takes patience, but watching that first flower bud form again is incredibly rewarding.
Quick Indoor Lily Care Checklist
Here’s your easy reference guide. Print this out and stick it on your fridge:
✓ Light: Bright, indirect light for 6-8 hours daily
✓ Water: When top 2 inches of soil feel dry; drain thoroughly
✓ Temperature: 60-75°F, avoid drafts and temperature extremes
✓ Humidity: Moderate (40-50%); mist leaves if tips brown
✓ Fertilizer: Every 2-3 weeks during growing season with diluted liquid fertilizer
✓ Soil: Well-draining mix with perlite for drainage
✓ Pot: Must have drainage holes; 2 inches wider than bulb
✓ After blooming: Let leaves die back naturally, reduce water, provide cool rest period
FAQs About Indoor Lily Care
How often should I water my indoor lily plant?
Water your indoor lily when the top 2 inches of soil feel dry to the touch. This typically means every 3-5 days during active growth, but always check the soil rather than following a fixed schedule. Overwatering is the most common cause of lily problems.
Why are the leaves on my indoor lily turning yellow?
Yellow leaves on lily plants usually indicate overwatering, underwatering, or natural aging. If the soil is constantly wet, reduce watering frequency. If leaves feel crispy and dry, increase watering. Bottom leaves naturally yellow as the plant ages—this is normal.
Can I keep a lily plant alive indoors year-round?
Yes, you can keep a lily plant alive indoors with proper lily plant care tips for beginners, including bright indirect light, well-draining soil, and appropriate watering. Most lilies need a dormancy period after blooming to flower again, which involves reducing water and keeping the bulb cool for 8-12 weeks.
What’s the best location for an indoor lily plant?
Place your indoor lily 3-4 feet from an east or west-facing window where it receives bright, indirect light but not harsh direct sun. Avoid spots near heating vents, air conditioners, or drafty doors. Consistent conditions help prevent stress and keep blooms lasting longer.
How do I make my indoor lily bloom again?
To encourage indoor lily blooming, allow the leaves to die back naturally after flowering, stop watering almost completely, and store the pot in a cool location (40-50°F) for 8-12 weeks. Resume watering and place in bright light to stimulate new growth and eventual blooming.
Final Thoughts: You Can Totally Do This
Listen, I know indoor lily care can feel overwhelming at first. But here’s what I’ve learned after killing way too many plants in my early years: lilies aren’t fragile divas. They’re actually pretty tough when you give them the basics.
Start with the fundamentals—proper light, the right watering routine, and well-draining soil. Master those three things, and you’re already 90% of the way to success.
Don’t beat yourself up over a few yellow leaves or if your lily doesn’t bloom again immediately. Even professional growers lose plants sometimes. Every mistake teaches you something new about what your specific lily needs in your specific home.
The fact that you’re reading this guide tells me you’re the kind of plant owner who cares enough to get it right. That intention matters more than you think.
Now get out there and show that lily who’s boss. You’ve got this.
⚠️ Disclaimer
The information in this article is for educational and informational purposes only. While every effort has been made to provide accurate and practical advice on indoor lily care, results may vary depending on your home environment, plant variety, and local conditions.
The author and website are not responsible for any loss, damage, or issues that may occur from following the care instructions. Always use your judgment and, if needed, consult a professional horticulturist or plant expert.
📸 Image Credit
All images used in this article are sourced from Freepik and are used under the Freepik license for editorial purposes:
- Healthy indoor lily in bright room – Freepik
- Overwatered lily with yellow leaves – Freepik
- Indoor lily blooming in apartment – Freepik
Related Articles You’ll Love
- How to Take Care of Indoor Plants for Beginners: 7 Unkillable Plants That Thrive in Low Light – Perfect for beginners who want hardy indoor plants.
- Easy House Plants to Take Care Of (+ Watering Tips) – Learn simple watering and care techniques for common houseplants.
- Indoor Plant Care Tips: 10 Ways That Actually Work – Step-by-step tips to keep your indoor plants healthy and happy.